


I remember playing with Shrinky Dinks as a little girl, and I loved watching the designs magically shrink in the oven right before my eyes. It was on a recent trip to the art store that I rediscovered the world of Shrinky Dinks and found sheets of special paper that are perfect for making your own DIY Shrinky Dinks. There are a million and one things you can do with finished Shrinky Dinks but, before we get to that, here’s how you make them.
 -Shrinky Dink Template 2: Download here
 -Shrinky Dink Template 3: Download here
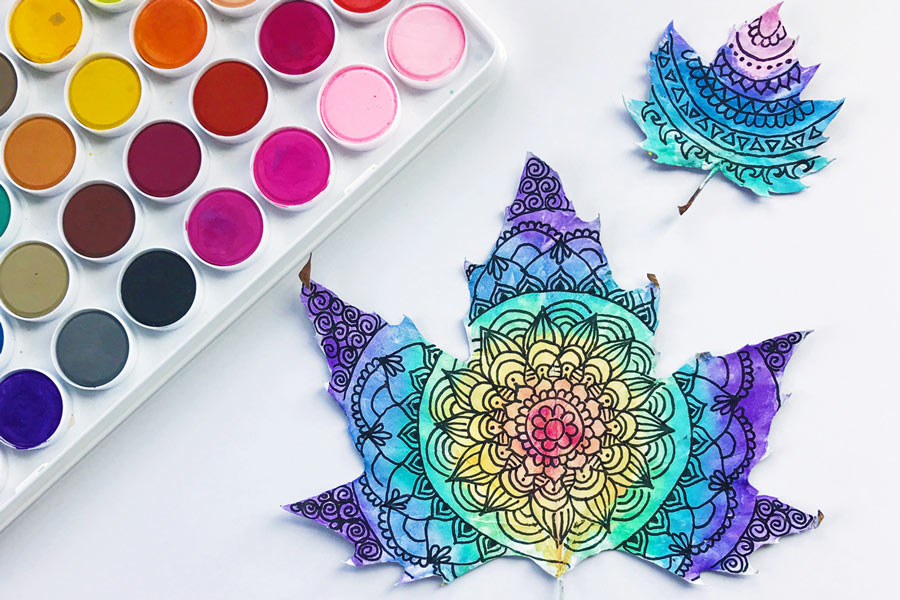
 2. Color - Use your colored pencils to color in the details on the rough side of your paper. Keep in mind that colors will appear more vibrant and darker once you put your designs in the oven. Experiment with shading and other coloring techniques to add depth.

 3. Cut and Punch - When you cut out your Shrinky Dinks, try to keep your corners rounded and leave room for a regular-sized hole punch above your design if you don’t want to punch directly onto your design. For the hole, use a regular ¼” hole punch. Anything smaller will close up when you bake and shrink your design.
 4. Shrink - Line a baking sheet with parchment paper or tin foil and place several of your designs on top. I shrunk 2-3 designs at a time and tried to choose designs that were similar in size. It’s normal for your design to curl during the shrinking process. If your design curls and gets stuck and does not uncurl, open the oven and use an oven mit to flatten the design. You’ll want to watch closely as your designs will shrink quickly. Once they flatten out, wait 30 seconds to remove them from the oven. If some Shrinky Dinks are not completely flat, remove them and immediately put a piece of paper on top of them and a heavy book to help flatten.

 5. Seal and Embellish - Once your Shrinky Dinks have cooled it’s time to seal them so that the colored pencil does not rub off. I used my favorite sealant and sprayed one layer over the designs. To add extra sparkle, use glitter glue on the smooth side of your finished design. You can also add mini rhinestones for an extra special touch.
 6. Create - Now that your DIY Shrinky Dinks are finished there are endless Shrinky Dink ideas for the finished designs. You can:
- Turn them into jewelry
- Add a pin and wear your design as a brooch on clothing, shoes, or bags.
- Decorate the outside of a card.
- Use a string or ribbon and attach to a decorated mason jar.
- Attach them to gift and party bags.
- Make ornaments.
- Create keychains.
- Decorate a pen pouch, backpack, or lunch bag.
6. Create - Now that your DIY Shrinky Dinks are finished there are endless Shrinky Dink ideas for the finished designs. You can:
- Turn them into jewelry
- Add a pin and wear your design as a brooch on clothing, shoes, or bags.
- Decorate the outside of a card.
- Use a string or ribbon and attach to a decorated mason jar.
- Attach them to gift and party bags.
- Make ornaments.
- Create keychains.
- Decorate a pen pouch, backpack, or lunch bag.
 Hope you are feeling inspired to start shrinking! I’d love to see what Shrinky Dink ideas you come up with! If you’re on instagram tag your post #ArtwithIA. For more colorful ideas and DIYs, be sure to follow along on Instagram with me and OOLY.

Supplies You'll Need For Shrinky Dink Charms:
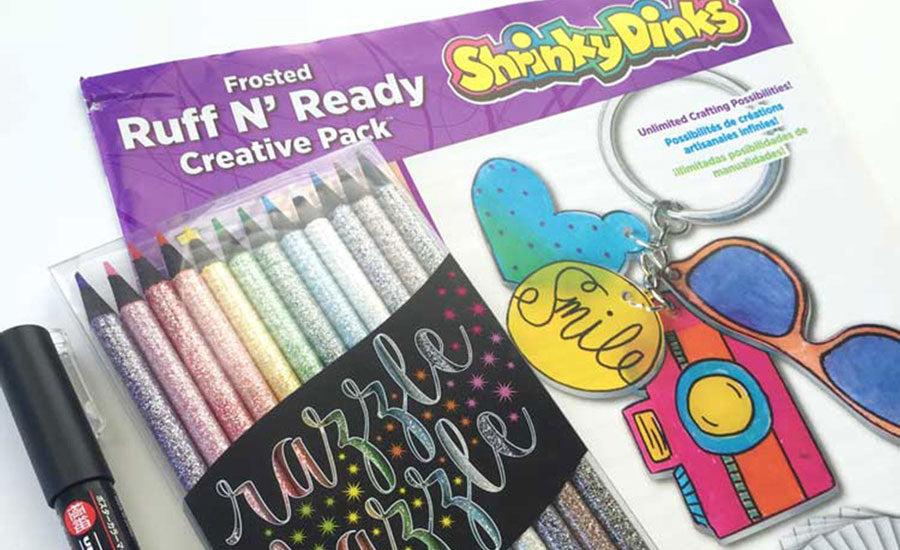
-Shrinky Dink frosted paper (I prefer frosted paper over glossy paper because I like the look of colored pencil on the paper) - Colored pencils (I used the Razzle Dazzle colored pencils from OOLY. Some other fun options are Triangle Colored Pencils and 2 of a Kind Colored Pencils) - Permanent pen (I used a black posca extra fine paint pen, but you could also use a Sharpie) - Scissors and hole punch - Sealant (I used Design Masters Clear Finish in Matte) - Parchment paper or tinfoil - Embellishments (optional)
Directions and Templates for Shrinky Dinks:
1. Design - I’ve made the design part easy for you and created several Shrinky Dink templates that you can download and use to trace your design directly onto the Shrinky Dinks paper with a paint pen or Sharpie. If you want a 3D effect, trace the image on the smooth side. If you draw the outline on the smooth side, once it’s baked you will only see that outline on the smooth side. If you draw the outline on the rough side, you will see the outline on both sides once it’s baked. - Shrinky Dink Template 1: Download here
-Shrinky Dink Template 2: Download here
-Shrinky Dink Template 3: Download here
2. Color - Use your colored pencils to color in the details on the rough side of your paper. Keep in mind that colors will appear more vibrant and darker once you put your designs in the oven. Experiment with shading and other coloring techniques to add depth.
3. Cut and Punch - When you cut out your Shrinky Dinks, try to keep your corners rounded and leave room for a regular-sized hole punch above your design if you don’t want to punch directly onto your design. For the hole, use a regular ¼” hole punch. Anything smaller will close up when you bake and shrink your design.
4. Shrink - Line a baking sheet with parchment paper or tin foil and place several of your designs on top. I shrunk 2-3 designs at a time and tried to choose designs that were similar in size. It’s normal for your design to curl during the shrinking process. If your design curls and gets stuck and does not uncurl, open the oven and use an oven mit to flatten the design. You’ll want to watch closely as your designs will shrink quickly. Once they flatten out, wait 30 seconds to remove them from the oven. If some Shrinky Dinks are not completely flat, remove them and immediately put a piece of paper on top of them and a heavy book to help flatten.
5. Seal and Embellish - Once your Shrinky Dinks have cooled it’s time to seal them so that the colored pencil does not rub off. I used my favorite sealant and sprayed one layer over the designs. To add extra sparkle, use glitter glue on the smooth side of your finished design. You can also add mini rhinestones for an extra special touch.
6. Create - Now that your DIY Shrinky Dinks are finished there are endless Shrinky Dink ideas for the finished designs. You can:
- Turn them into jewelry
- Add a pin and wear your design as a brooch on clothing, shoes, or bags.
- Decorate the outside of a card.
- Use a string or ribbon and attach to a decorated mason jar.
- Attach them to gift and party bags.
- Make ornaments.
- Create keychains.
- Decorate a pen pouch, backpack, or lunch bag.
Hope you are feeling inspired to start shrinking! I’d love to see what Shrinky Dink ideas you come up with! If you’re on instagram tag your post #ArtwithIA. For more colorful ideas and DIYs, be sure to follow along on Instagram with me and OOLY.


